Photomatix helps us create HDR images very quickly and easily. If you don’t have time to go through the details in every image,photomatix can also batch process all your images for you.
Let us take a look at how to convert your normal image to HDR
Let us take a look at how to convert your normal image to HDR
1) Take 3 photos (you can also take more than 3 but that will increase your processing time) of your scene. One normally exposed, and the other two over and under exposed.
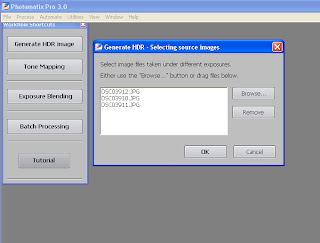
2) Open photomatix and click on Generate HDR Image on the left side panel. You can also do this by going to Process --> Generate HDR…
3) Now click on browse and select your three images that you have taken earlier and click OK.

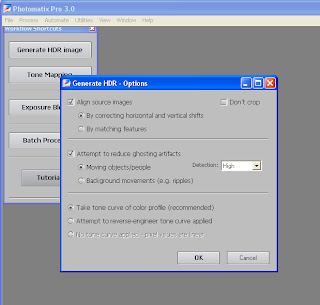
4) Make sure the Align source image and Attempt to reduce ghosting effects tabs are checked. Click OK

5) You will see your image,which doesn’t look that good. Click on Tone Mapping on the left side panel.
6) Now your image is better looking than the previous one. You can also do some adjustments to improve our image further. You can go and experiment with the various values. Here is a quick look at what do these values do
Luminosity
Adjusts the brightness of the shadows. Moving the slider to the right has the effect of boosting shadow details and brightening the image. Moving it to the left gives a more natural look to the tone mapped image.The optimal value depends on the image and the effect you want to achieve.
Strength
Controls the strength of local contrast enhancements. A value of 100% gives the maximum increase in local contrast.The optimal value depends on the image and the effect you want to achieve.
Color Saturation
Controls the saturation of the RGB color channels. The greater the saturation, the more intense the color. The value affects each color channel equally.
White Clip - Black Clip
From watching the way the histogram changes, the white clip adjusts the highlight contrast and the black clip adjusts the shadow contrast.
Micro-smoothing
Basically this setting should be called “How arty do you want your shot?” At 0 you can get the cool arty style HDR images with all the detail in everything from walls to clouds you didn’t know where there. However, if you want a nice simple blended exposure photo set it to 30. 95% of the image should be perfectly exposed as if you spent hours putting them together in Photoshop. This is a great new addition to Photomatix as it allows people to use the software as they see fit. If they want a nice photo that is perfectly exposed then they can get that just as if they used ND Gradient filters on their lens. However, if like me they want something a bit more unique they can drop the micro-smoothing down and get something dramatic.
Light smoothing
Never set this below 0 as you will get horrible results.
Microcontrast
Controls the accentuation of local details. The default value (High) is the optimal value in most cases. However, this control may be useful in the case of a noisy image or when the accentuation of local details is not desirable (e.g. seams of a stitched pano in a uniform area may become visible when local details are too much enhanced).
7) I used these values shown in the above picture, they may differ from image to image and on what you want to achieve for our final image. You can go and play around these values to suit your image.
8) After everything is done click on Process and our final image will be ready
9) Now you can go to File --> Save as and save the image in whatever format you want.
 Before
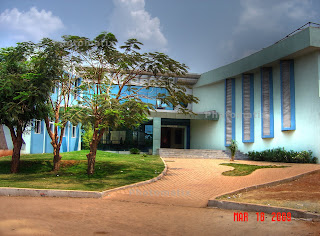
 After
AfterHope you enjoyed the tutorial and learnt something from it. You can also convert to HDR using Photoshop. May be next time I will do a tutorial on converting images into HDR using Photoshop. So until next time take care and please comment.

