I am going to show you how make a HDR image.
First you have to make the basic camera setup. In the camera mode enable the expert bracket mode. This enables your camera to take 3 photos of a single shot in three different exposure levels. One in the normal mode, other two in over and under exposed modes.
I have a Sony Cyber shot 5MP camera. Here under photo mode press menu, you will get 5 options. You have to select the third option i.e. Expt Brktg.
It may be different in your camera, you just have to find and enable that option,
Now go to Photoshop (The HDR option is only available in Photoshop CS2 and beyond).
In Photoshop do as following:


From the dropdown menu select the folder option and open the folder with the 3 photos. You can also select file and browse the files individually but by opening through folders it helps Photoshop align all the files itself and provide better results.
After that press OK
 The result will be something like. Press OK.The resulting imaging is not at all good. But don’t worry we will do some adjustments.
Apply the following adjustments.

 Here in the HDR conversion menu select Local Adaption from the dropdown menu and apply the settings as shown in the fig. above and press OK.
Then go to Image--->Adjustments --->Shadows/Highlights… and apply the following adjustments:

The values may vary from image to image and on what you want to achive.I use these values for most of my images with little tweaking. You can always be creative and play around with the values.
Now go to Image ---> Adjustments ---> Brightness/Contrast and set the contrast value to +10.
Now go to Image ---> Adjustments ---> Curves and apply the following settings:

And as I said earlier you can always play around with the values to suit your image. But you should always bring the lower part of the curve downwards so that you get nice contrast to the image or your image will look too bright. Press OK.
Go to Image ---> Mode ---> 8bits/Channel and save the image as jpeg or any other image format and your done.
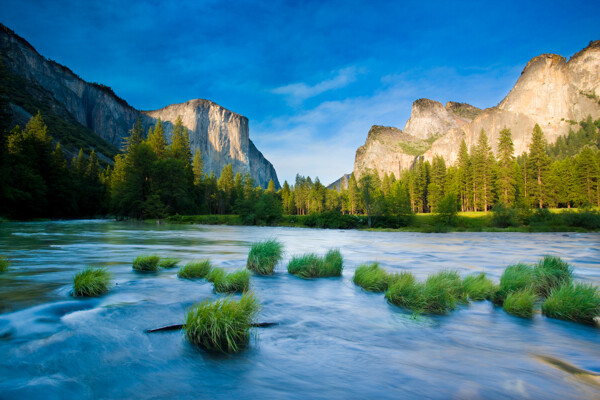
The result achieved is
 TO
TO
You can see that every detail in the image has been greatly enhanced from the coloring of the sky to the details of the shadow.
By adjusting the tone curve of Local Adaption in the HDR Conversion menu you can get a more realistic image like the one below. It’s up to you on what kind of image you want a great looking image like the one above or a more realistic image. Both are definitely way better than the original image it’s only about how much of the magical touch you want to add.

Hope you enjoyed this article. Your comments are most welcome and if you have something more or any new things on HDRI please do share with me.
Other professional HDR Images